Build an Ink-Style Martial Arts Game with AI
Build an ink-style martial arts game from a visual reference, a 3D character, and playable levels. Shikhar shares a staged workflow using Claude Code, GPT Image, Tripo, Blender, and Three.js.
Works with Claude Code
Overview
What you get
- A game demonstration, reference video, character motion, prototype playtest, scene image, and level concept art.
- A staged guide to planning a route, testing movement, building a character, and expanding levels.
Tutorial
Turn an ink-painted world into a playable scene
An ink-style martial arts game needs scenery, characters, and movement that belong to the same world. This case starts with a reference video, then rebuilds its scenery and character as a playable Three.js level.
The gallery follows this order. The names below identify the media used in this guide:
| Position | Name |
|---|---|
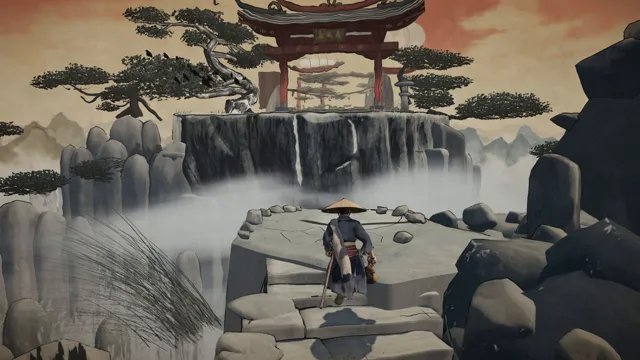
| 1 | Final game |
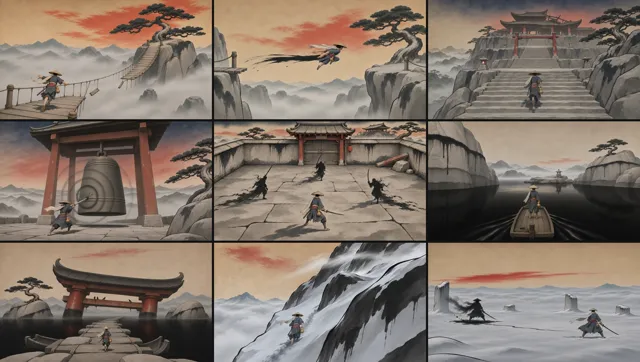
| 2 | Visual reference |
| 3 | Scene construction |
| 4 | Character motion |
| 5 | Prototype playtest |
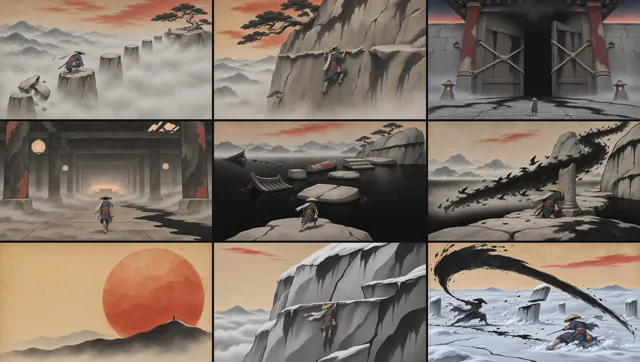
| 6–7 | Level concept art |
| 8 | Level iteration |
Watch “Final game” and notice:
- How misty mountains, stone steps, and a wooden bridge form a route.
- How the character keeps the silhouette and colors of the reference within a 3D scene.
- How movement, the camera, ground surfaces, and obstacles work together.
The creator divides the work across these tools:
| Tool | Role in the thread |
|---|---|
| Flux 3 Max / fal | Producing the reference video that establishes the visual direction |
| GPT Image | Character views and level concept art |
| Tripo | Turning character references into a 3D model |
| Blender | Rebuilding 3D scenery assets |
| Claude Code / Opus 5.5 | Code, scene assembly, animation, and iteration |
| Three.js | Browser rendering and game interaction |
Prepare access to these tools and a project folder for code and assets. The exercise is a short route: a wandering swordsman crosses a wooden bridge to reach a mountain gate. The requests below are editorial suggestions based on the thread. Confirm each stage before moving on to the next tool or task.
Establish the style with a reference video
-
Choose a simple route, one character, and a few visual traits: a mountain bridge, a swordsman in a conical hat, paper-like gray ink, and a small amount of warm color.
-
Create or choose a reference video and save it in the project. “Visual reference” in the gallery is the video used by the creator. Compare it with “Final game” to see what carries across.
-
Capture frames that clearly show the character, terrain, and buildings. Ask Claude Code to organize the work:
Reference material: [video and frame paths].
Build an ink-style martial arts 3D browser game in which a swordsman crosses a wooden bridge to reach a mountain gate.
First analyze the reference colors, materials, character silhouette, terrain, and camera.
List assets needed for the first route and assets we can reuse later. Present a plan and wait for approval.
Check that the list includes gameplay surfaces and a destination as well as visual assets. Reference images establish appearance; the traversable route still needs to be defined in 3D.
Build the first traversable route
-
Start with one bridge asset. Send this request to Claude Code to obtain a script for your local Blender installation and instructions for running it:
Use [bridge reference image path] to build a simplified wooden bridge for this project. Write a Blender Python script that creates the deck, planks, and railings, and saves an editable .blend file. Export a GLB with materials to the project's asset folder. Specify its dimensions, orientation, file locations, and how to run the script. Build only the bridge first. Wait for my review before adding steps and a gate. -
Run the script in your local Blender installation using the supplied instructions. Open the model to check its deck, railings, and materials. Give Claude Code the exported GLB path and ask it to display the bridge in a Three.js test scene with startup instructions. Once you can inspect the model in the browser, use the same process for the steps and gate.
-
Test the route with a placeholder character before finishing the artwork:
Build only the route from the bridge to the gate. Give a placeholder character movement and turning, with a camera that follows the character. The bridge and ground support the character; rocks block movement. Show a completion state at the gate and allow a restart after falling. Explain how to start and play the project, then let me inspect this route. -
Start the project using its instructions. Walk onto the bridge, approach an obstacle, reach the destination, then fall and restart.
Focus on completing the route and seeing what lies ahead. Fix falling through surfaces, getting stuck, and blocked camera views before adding visual detail. The creator also tests the prototype before expanding the world.
Build the character from four views
-
Capture the reference character and use GPT Image to create front, back, and both side views. Keep clothing, hat, proportions, and accessories consistent.
-
Upload the four character views to Tripo to create the model. Check its silhouette and colors. After importing it, check its scale, facing direction, and foot position.
-
Give Claude Code the model path and ask it to inspect the rig and animations first:
Inspect [model path] for a skeleton and idle and walking animations. List the animations that are actually available. If anything is missing, propose a suitable way to add it. Explain which steps belong in Blender and which belong in project code. Present the plan and list any assets I need to provide. Wait for approval before implementing it. -
Approve the animation plan and supply any required assets, then ask Claude Code to replace the placeholder and add movement in stages:
Replace the placeholder with [model path]. Preserve the tested movement, collisions, and completion logic.
Start with idle-to-walk transitions. Check turning and foot contact before adding clothing movement.
Keep the existing camera-follow behavior. Let me inspect each change in the browser.
The thread includes a character motion demonstration and describes using Opus for cloth physics and animation. Stabilize basic movement in your project before working on clothing details.
For a small change, send this request to Claude Code:
Change the character's main clothing color to dark blue. Keep model proportions, animations, collisions, and camera settings.
First check whether a material or texture controls the color, then edit the relevant asset and show a browser preview.
Play the same route again to check that the appearance change has preserved movement.
Extend the style into your own levels
The creator uses GPT Image to produce level concepts in the established style, then builds and tests the scenes. The thread mentions up to eight concept images per level. Start by creating one concept image that explains the route and destination, adding views as needed.
Give GPT Image a screenshot of the existing game and fill in this request:
Use [existing level screenshot] as the reference for ink-style materials, character proportions, and colors.
Create level concept art for [for example, a bamboo forest at night].
The start is [entrance] and the destination is [mountain gate]. Make the traversable route and main obstacles clear.
Keep the existing character and visual style. Start with one image that explains the spatial layout.
Confirm that the route is clear, save the image in the project, and note its actual path. Then replace the bracketed details below and send this to Claude Code:
Existing project: [path]. Tested route: [start to destination].
New level theme: [for example, a bamboo forest at night]. Player goal: [for example, find the mountain gate].
Keep the existing character, controls, and ink-style materials.
Use [concept image paths] to plan the route, obstacles, and destination. List reusable and new assets.
Build a small playable section first, then expand after approval. Provide startup and checking instructions for this project.
Report playtest feedback as a location, action, and result: “At the bridge exit, turning right puts the camera behind a rock and hides the path.” Address one type of problem at a time, then check the previously working route. This gives the agent a clearer task than “make the whole game more fun.”
Workflow source: the creator’s complete thread. The creator credits OdinLovis’s Video2Game as an inspiration.